Wednesday 24 May 2023

In the lair of the Mutants - Part III

Well, it's been a few years, but I did actually play that third game in the end, but being able to get out of the house prevented me from wanting to sit down and write this one out. Why get back to it after all this time? Well, I've been collating some of my stuff over on my main blog (leadcapes.blogspot.com) and that includes my "superhero" 40k stuff like Inquisitor Kang and, as we're about to see, Kill Team Aesir. There has also been some discussion in the group of using this blog a little more again, so maybe that will play out in the future, who knows?

With an entire Inquisitorial Stormtrooper squad lost to a rabble of mutant scum, the order to purge the site was given, with the nearest team available for the action, none other than Kill Team Aesir, mighty warriors of the Deathwatch! Woe betide the enemies of the Imperium!


Ok, so it's hardly fair, but I've bought along six Deathwatch Veterans for this run, hoping that my rolling will hold out long enough to get revenge for the last two games. I've bought a good core group with Thor, Jane Foster Thor, Volstaag, Fandhal, Balder and Hogun, so my plan is to overwhelm the Scavvies with firepower and then mop up with Thunder Hammers. But we'll see how that goes.


For once, I drew a couple of good cards, so I'm feeling confident going in. To keep things simple, all I have to do is kill the Mutant Psyker, with the enemy deck set up pretty much the same as the previous two games.


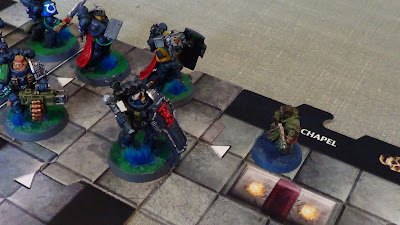
The first foe to appear is a lone Scavvie, right in the sights of Volstaag and his Deathwatch Frag Cannon, who wastes no time lighting the heretic up.


Yeah, it's overkill (three times over, in fact), but I'm done with these damn Scavvies and want to paint the walls with their brains.


The next Scavvie to be found is spotted by Hogun, who lacks any ranged weapons, but can still Charge.


With the two cards I drew at the start of the game, I can double Hogun's damage and double it again. With his Power Maul, the Scavvie stood no chance and I moved on to the next Veteran.


My typical luck with this mission finally appears when Balder finds a Scavvie with Autogun and his automatically-hitting Deathwatch Shotgun fails to do anything to the target.


Of course, the return fire is deadly and Fandhal also can't deliver with his Shotgun fire either.


In what would become a trend for the game, the Frag Cannon does the real work, the little scorch mark on the floor being a fun coincidence of the D&D tiles.


The first Scavvie Boss has appeared, and whilst Mighty Thor can't shoot at him, her Storm Shield helps prevent the mutant's attack from doing any damage.


Thanfully, the Odinson is nearby to bring the hammer down, to devastating effect.


Thanks to some good card draws and my having learnt my lesson about staying grouped up, I manage to push forward with no casualties and minimal fuss for a little while.


Even the appearance of a fearsome Big Mutant is something of a non-issue thanks to the mighty Frag Cannon.


The next, very minor, setback, sees a lucky Autogun shot from a Scavvie take Hogun down a wound. Once again, however, Thor makes short work of the filthy mutant.


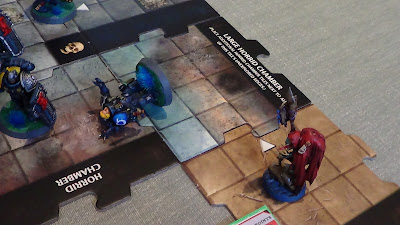
Finally, Hogun uncovered the hiding place of the Scavvie Psyker, my recurrent nemesis for these games. With psychic powers, multiple wounds and a focus on getting away from combat, he will prove to not be an easy foe to bring down, even with the mighty weapons of the Deathwatch.


In a fun little quirk of the AI I adapted, the Scavvie Psyker backs off and gets the second Scavvie Boss as backup. I try to send Mighty Thor around the back to get into melee with her Thunder Hammer, but instead close off the Psyker's retreat, which isn't a bad consolation prize, all things considered.


Wanting to put the Scavvie Psyker down before he can use his devastating Psybolt to start killing a Veteran per turn, I charge in Thor to attempt to mop both him and the Scavvie Boss up in one go. Sadly, the Psyker survives unharmed and blasts the God of Thunder to the halls of Valhalla.


When you have a Thunder Hammer, every problem looks like a heretic. Using another card to boost my chances of wounding, I charge in Mighty Thor, who doesn't do much better than her namesake, but at least survives the backswing.


Another retreat to find backup at least limits the damage that the Scavvie Psyker can do in his turn, plus both the Big Mutants and Bosses have been pulled from the deck, so only the easiest enemies in the game can pop up from now on to slow me down.


After using Fanhal to clear away the Scavvie, I let him take the risk of getting hit by the Psybolt because he has the lowest damage weapon left on my table and therefore is probably the most expendable. He is removed by the powerful psychic attack, but his sacrifice is not in vain.


Thanks again to the power of the Frag Cannon, the mission is finally complete. It only took three games and going way over powered in the final run, but some of the weakest foes in the Galaxy are finally purged.

As I said above, this game came right at the end of one of the big Melbourne 2020 COVID lock downs, so I didn't have a lot of motivation to continue these games, though I do still have most of the stuff I used to play them. I'm not currently living somewhere where I can set up a big game and I do get to play games at least a few times a week on average, so solo play isn't something I really feel the need to do. Hopefully this was fun to read at the very least, even with a three year hiatus.

Saturday 8 August 2020

Pugnant. Mordent.

Separated from the bulk of the Imperium by the Great Rift, the Sectorum Ludus Bellorum is a region of space where it is rare to find anything new. The best connected factions may have heard tell of such things as Primaris Space Marines and the return of Primarchs, but only as whispered rumor and idle speculation. The few remaining bastions of Imperial rule have all but given up on ever being reinforced, but every so often, a glimmer of hope finds its way into the Sectorum. 

Tau surveillance drones uncovered footage of what appears to be a group of Space Marines in a new kind of armour battling cultists of the Birds of Paradise Slaanesh Cult. Some of these images found their way into the hands of a local Rogue Trader and from there made their way slowly across the Sectorum.

 Under attack by foul cultists, these unknown marines make a stand at a supply dump. 

 The livery on the Marines would seem to indicate that they belong to the semi-heretical Space Sharks Chapter. 


 These Marines are armed with weapons never seen in the Sectorum before. 


The mysterious Space Sharks are known for appearing from nowhere to aid the servants of the Emperor, could this be an example of that legend, or something more? Has someone found a way to cross the Great Rift and what does this mean for the future of the Sectorum? Only time will tell. 
 

Monday 11 May 2020

In the lair of the Mutants - Part II

After the first game, I was pretty keen to give my solo system another go, tweaking a couple of things before I dove in again. Last game, the "Monster Mechanic" worked fine, so that remained unchanged, but I wanted to add more objectives to the overall scenario, to give the option of Degrees of Success/Failure. Given that Ordo Chronos Inquisitor Kang was taken out by a Scavvie in the last game, I decided that he had been captured and a team was being sent in to either rescue him or make sure the Mutant Psyker didn't get its hands on Kang's Force Stave. This time, taking out the Mutant Psyker would be a tertiary objective, after rescue and recovery. 


To this end, I went through my D&D dungeon tiles, pulling out something that approximated a gaol cell and a couple of "exits". Each of these was shuffled into a pile of 9 other tiles, so that for every ten or so tiles I explored, one would be revealed. When the "Vault" tile would be revealed in-game, Inquisitor Kang would be inside and enter the game once freed; because he had been captured, although Kang would join my Kill Team, he would be unarmed and begin with a Flesh Wound. Getting Kang to an Exit would be my major Victory Condition for the game. 


In my mind, the team being sent in after Inquisitor Kang would have been scrambled pretty quickly, so nothing too crazy, but perhaps an Ace in the hole? The remaining Karskins would be joining Lance Corporal Cloud for the next mission, Sergeant Storm will be leading, with Lance Corporal Clay toting a Grenade Launcher and Privates Heath and Glanzman issued with Hot-Shot Lasguns. To add a bit of needed punch, one of Inquisitor Kang's personal retainers, M'Baku, the Man-Ork, an Imperial Guard Ork Hunter Veteran, would join the Karskins. Rules-wise, M'Baku is an Ork Nob with Big Choppa, and obviously my Combat Specialist. This Kill Team comes in at 81 points, meaning I'm a bit more even against the Scavvies than last time. 


For this battle report, I'll just be covering the major events of the game and talking about what I'm doing. I had my models set up and ready to go, drawing cards that would help me with Close Combat and Psykers, not an ideal start, but I'd learned lessons from my first defeat and was ready to purge the mutants in the name of the Emperor! 


Entering the dark catacombs, Sergeant Storm was nervous, and with good reason; he'd lost several good men on the last mission and Lance Corporal Cloud was visibly shaking at being back in the lair of the mutants. The presence of M'Baku was at once reassuring and unnerving, as the massive veteran could clearly hold his own in a fight, but his affectations of Orkish habits and weapons were uncomfortable reminders of past campaigns. Setting the expression on his face to one of grim determination, SGT Storm gave the order to push forward into the grim, dark catacombs. 


The first Scavvie to be found is quickly burned to a crisp by LCP Storm, who, by now, has become a veteran mutant hunter. Learning from the mistakes I made in the first game, I opt to stay clumped up so that my team can support each-other and to not explore too far out too quickly.


PVT Glanzman ruins this plan in my second action, by finding a Large Chamber containing a Big Mutant, Scavvie Boss and Scavvie. Knowing that the Big Mutant is the major threat, I elect to have Glanzman fire at it and risk losing him in the return fire from the Boss and Scavvie. 


I luck out and wound twice with Glanzman's Hot-Shot Lasgun, dealing a Flesh Wound to the Big Mutant, but he still gets his turn and charges for the nearest target, M'Baku. Although I don't want to risk losing my Combat Specialist so soon in the game, M'Baku has two Wounds and a 4+ Save, so he's probably the best possibility to survive a charge from the Big Mutant. 


Again, I get lucky, M'Baku emerges with only a Flesh Wound, even after all four of the Mutant's Attacks hit. Even though M'Baku is a major close combat asset, I decide to charge in SGT Storm as my next action instead, as his Power Fist is more likely to Wound and does more Damage, increasing the odds of taking the beast down. 


My luck is with me a lot more in this game, and SGT Storm's attack gets the desired result. Also, despite weathering two turns of shotgun fire from the Boss and Scavvie, PVT Glanzman has remained unscathed, but I know my luck won't hold out and I need to back him up. 


LCP Clay brings up his Grenade Launcher, which gets D6 shots, again, I'm playing the odds. Once again, I score a Flesh Wound, getting one in return when the Scavvie Boss shoots back. 


With a new turn, I decide to clean up my mess with the tried-and-true Imperial method, purging with fire! LCP Cloud once again proves his worth, tempting me to scrounge eBay for more Karskins with Flamers. Pretty sure I can run up to four in a Kill Team.


The unlucky Scavvie who has missed every 3+ shot for four turns in a row finally clips Glanzman, dealing a Flesh Wound. 


Glanzman returns fire and I finally have a Scavvoe-free board. Doing some rough math in my head; I've revealed 4 tiles, so one of the next 6 has to be the cell holding Inquisitor Kang. Ideally, I'd like to avoid getting too spread out or trapped in a narrow corridor with a Big Mutant, so I elect to explore the edges closest to the entrance first. 


Working together, SGT Storm and M'Baku head Map-North, uncovering another Scavvie, who is quickly dispatched by M'Baku's Big Choppa. 


Keeping nearby, Glanzman uncovers another Scavvie, but fails to take it out in the first shot. Here I took advantage of the vagaries of my own rules, as the Scavvie Monster Card states that a Scavvie will shoot at the closest target, regardless of the viability of the shot. With SGT Storm behind the corner, as shown here, he is technically the closest target, but is both Obscured and In Cover, making the shot pretty difficult. In a real game of Kill Team, if I were playing the Scavvie, I'd shoot at Glanzman, who is a clear target and, due to his Flesh Wound, requires only a 3+ injury roll to remove from play. 


In the end, it doesn't matter too much as I'm forced to bring up LCP Cloud and, once again, solve all of my problems with fire. 


I take a moment to take stock of where I'm at. I've been lucky to not lose anyone so far, and should be close to Inquisitor Kang and, thereby, my primary objective. It was at this stage that I started to lose the game; not due to any dice rolling or bad moves, but I got too confident and started to over-extend my forces. 


The very next room I found was Kang's cell, thanks to a Large Chamber tile revealing two tiles at once. PVT Heath is now facing down two Scavvies, but I'm still pretty confident, right up until Heath misses both shots at 2+. 


The game is now turning, though at the time I hadn't quite realised it, with the Scavvies gunning down Heath with a handful of 6s. 


Seeing my primary objective so close, I pull out all the stops to remove the two Scavvies in my way. I charge M'Baku in, playing the "Slam" card to give me a 1-in-6 chance of causing a Mortal Wound on top of the four Attacks I would be getting. Of course, I rolled a handful of 1s and 2s. 


I want these Scavvies dead, so I also Charge SGT Storm in, who at least deals some damage with his Power Fist, but I'm still disappointed that all the dice I've rolled have turned up so little this turn. 


Still somehow pretty confident, I decide to have LCP Storm explore a little more, hoping to luck out and hit the Mutant Psyker sooner rather than later and clean-sweep all of my objectives. Naturally, the first enemy I hit is a Big Mutant and Cloud's Flamer fails to do any damage. 


The return attack of the Big Mutant brings LCP Cloud's heroic run to an end, and a big gap in the rear of my forces. Now I'll have to get Kang out past the Big Mutant, which I don't like my chances of doing. 


Things rapidly go from bad to worse as the Scavvie guarding Kang's cell is able to take out SGT Storm with a swing from the butt of his shotgun. As the turn ends, I'm forced to make a Break test. 


And I fail. Once again, the might of the Imperium is no match for a rabble of mutants. As losing SGT Storm was kind of the tipping-point, I'm not sure how much better I would have gone if Cloud hadn't risked exploring, but, once again, it was a close game. The COVID-19 lock-down eases to the point where I could get a Kill Team game in at a friend's house tonight in Victoria, Australia, but I have one more game idea for this solo-play set, so you'll probably see that at some point as well.